Visual Studio 2022

Shortening CustomCommand development time by using a proxy

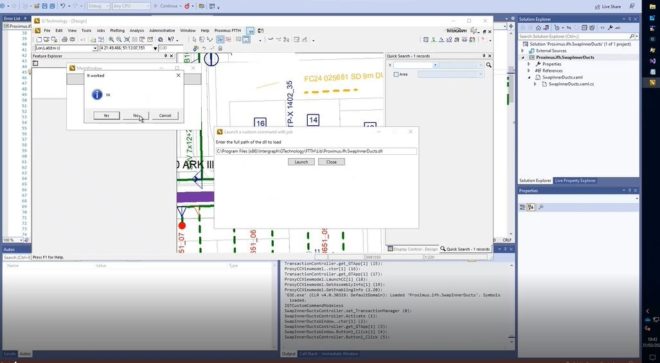
One of the most time-consuming processes when developing with Hexagon G/Technology is creating custom commands. The usual development approach consists of the following iterative process:

  • Compile custom command
  • Launch G/Technology
  • Test custom command
  • Exit G/Technology
  • Modify custom command
During testing, only limited changes to the source code are allowed by the Visual Studio Edit and Continue function, effectively requiring multiple iterations of this sequence.

The process of starting and closing G/Technology can easiliy takeup multiple minutes and you need to close it because G/Technology will lock any assemblies containing your custom commands.

Customcommands are written in DotNet and therefore run in something called an “Assembly Domain”, in this case the G/Technology Assembly Domain. When you create a custom command loading other custom commands in its own assembly domain, dotnet will not load the same assembly again in fact creating a proxy. The following code snippet demonstrates this:

string assembly = @"c:\Program Files (86)\Intergraph\GTechnology\YourCustomCommand.dll";
byte[] assemblyBytes = File.ReadAllBytes(assembly);
System.Reflection.Assembly assemblyToLoad = Assembly.Load(assemblyBytes);

Type entryClass = assemblyToLoad.GetTypes().FirstOrDefault(t ⇒ typeof(IGTCustomCommandModal).IsAssignableFrom(t));
if( entryClass != null)
{
    IGTCustomCommandModal CCModal = (IGTCustomCommandModal)assemblyToLoad.CreateInstance(entryClass.FullName);
    CCModal.Activate();
    return;
}

entryClass = assemblyToLoad.GetTypes().FirstOrDefault(t ⇒ typeof(IGTCustomCommandModeless).IsAssignableFrom(t));
if( entryClass != null)
{
    IGTCustomCommandModeless CCModeless = (IGTCustomCommandModeless)assemblyToLoad.CreateInstance(entryClass.FullName);
    CCModeless.Activate(_customCommandHelper);
    return;
}

This snippet scans an assembly for a type implementing either interface ‘IGTCustomCommandModal‘ or ‘IGTCustomCommandModeless‘, which both can be found in namespace ‘Intergraph.GTechnology.Interfaces‘ and are needed to implement customcommands. If a type implements one of these interfaces, the proxy customcommand creates an instance of it loading it in the assembly domain.

When this approach is used to load custom commands, G/Technology will not lock the containing assemblies after closing the custom command, enabling much shorter development cycles.

The technique constists of 2 or more custom commands, the first one being the proxy, the second one being the custom command to be developed. Once the first customcommand is started, it will show a dialog where the assembly containing the custom command to be developed should be entered :

Proxy dialog

Some extra querying to the G3E_CUSTOMCOMMAND table allows to provide useful metadata as shown in the pop-up window.

Then attach the Visual Studio debugger and press ‘Launch’ and any breakpoint in your customcommand should be hit and it can be tested. Once done, detach the debugger, modify code, compile and attach again, etc., etc. :

Debugging session active

An example of a session using this technique this can be seen in this this youtube video, showing a debug session of a custom command called “Swap Inner Ducts” which will just show a dialog and a messagebox, but the important part is that the customcommand is changed, recompiled and executed again using the Visual Studio debugger without leaving G/Technology.

Youtube video

Sources can be downloaded from here.

Credits go to Jan Stuckens for initially coming up with this idea.

Thanks to Michaël Demanet and Didier de Bisschop from Proximus for use of their environment to test this technique.

Notes :

  • the proxy needs to be built with debugging information, else breakpoints in the target customcommand won’t be hit
  • All referenced assemblies need to be loaded
  • This technique has been used with assemblies containing a single custom command, assemblies with multiple custom commands where not tested
  • G/Technology version 10.04.2002.00035 was used to test this approach

A Multilevel Responsive Blazor-menu

When you generate a Blazor-server app or Webassembly the standard template generates a menu docked to the left which is responsive, but has some drawbacks :

  • It doesn’t support multiple levels
  • It depends on bootstrap which introduces additional complexity
  • Menu-items are hardcoded

Webapplications need a flexible way enabling multilevel-, responsive menus, the standard template is not flexible enough for this purpose, this post describes a solution to this problem. The approach taken consists of the following parts :

  1. A Component ‘ResponsiveMenuComponent’
  2. A stylesheet ‘menu.css’
  3. JQuery functions to toggle menus

Suppose our requirement is to generate a menu whos structure comes from an external source and simulates a webshop, the menustructure looks like this :

Home
Jeans -> Wide leg jeans
Jeans -> Straight jeans
Jeans -> Loose jeans
Shorts -> Sweet jersey shorts -> Jersey1
Shorts -> Sweet jersey shorts -> Jersey2
Shorts -> Denim shorts
Skirts
Blazors

The ResponsiveMenu-component has a property ‘MenuEntryCollection’ which is used to render the menu. With the ResponsiveMenu-component in place, the following creates the required menu-structure :

MainLayout.razor :

<ResponsiveMenuComponent Items=@Items />

@code {
public MenuEntryCollection	Items = new MenuEntryCollection( )
	{
	new MenuEntry( ) { Text = "Home",		Url = "/" }
,	new MenuEntry( ) { Text = "Jeans",		Url = "/jeans" 
	, SubItems = new MenuEntryCollection( )
		{
		new MenuEntry( ) { Text = "Wide leg jeans",	Url = "/wide_leg_jeans" }
	,	new MenuEntry( ) { Text = "Straight jeans",	Url = "/straight_jeans" }
	,	new MenuEntry( ) { Text = "Loose jeans",	Url = "/loose_jeans" }
}
}
,	new MenuEntry( ) { Text = "Shorts",		Url = "/shorts" 
	, SubItems = new MenuEntryCollection( )
		{
		new MenuEntry( ) { Text = "Sweet jersey shorts",	Url = "/sweet_jersey" 
		, SubItems = new MenuEntryCollection( )
			{
			new MenuEntry( ) { Text = "Jersey1",	Url = "/Jersey1" }
		,	new MenuEntry( ) { Text = "Jersey2",	Url = "/Jersey2" }
	}
	}
	,	new MenuEntry( ) { Text = "Denim shorts",			Url = "/demin_jersey" 	}
}
}
,	new MenuEntry( ) { Text = "Skirts",		Url = "/skirts" }
,	new MenuEntry( ) { Text = "Blazers",	Url = "/blazers" }
};
}

The ‘MenuEntryCollection’ and ‘MenuEntry’-classes:

public class MenuEntryCollection : System.Collections.Generic.List<MenuEntry>{ }

public class MenuEntry
{
	internal string Text { get; set; }
	internal string Url  { get; set; }

	internal MenuEntryCollection SubItems{ get; set; }
}

When the website is rendered for non-mobile devices, multilevel-items are expanded by css included in ‘menu.css’. Before blazor, if a user would select an item in the menu a postback would occur rebuilding the menu, in Blazor this is not the case causing the selected menu-item to be expanded. In a regular blazor app, it is collapsed using css switched when a user clicks a div, the ‘@onclick=”ToggleNavMenu’ construct. Doing this for a menu whos structure is unknown in advance would be very convenient, therefore this is done using jQuery declared inside _Host.cshtml together with some other needed functions:

<script type="text/javascript">
window.onBlazorReady = function() {
	$('.top-menu').not(".mobile").click(function () {
		$(this).find('ul > li').toggle();
	});

	$('.top-menu').not(".mobile").hover(function () {
		$(this).find('ul > li').show();
	}, function() {});

	$('.menu-toggle').click(function () {
		$(this).siblings('.top-menu.mobile').slideToggle('slow');
	});

	$('.top-menu.mobile .sublist-toggle').click(function () {
		$(this).siblings('.sublist').slideToggle('slow');
	});

	$('.top-menu.mobile .sf-with-ul').click(function () {
		$(this).siblings('.sublist').slideToggle('slow');
	});

	$('.top-menu.mobile li:not(:has(ul))').click(function () {
		$(this).closest('.top-menu.mobile').toggle();
	});
};
</script>

The ‘onBlazorReady’-function is called inside the ‘OnAfterRenderAsync’ inside ‘ResponsiveMenuComponent.razor’:

protected override Task OnAfterRenderAsync( bool firstRender )
{
  if( firstRender)
  {
    ValueTask valueTask = JsRuntime.InvokeVoidAsync("onBlazorReady");
  }

  return base.OnAfterRenderAsync( firstRender );
}

A running website using this component can be seen here, sources can be downloaded from github.

Notes:

  • The menu in component ResponsiveMenuComponent is generated in codebehind which disables css-isolation
  • The example given is Blazor-server but can also be used for Blazor-WASM
  • Menu items for the desktop are collapsed on hover using css, but there is no such thing as ‘hover’ on mobile devices. Because of this, we need two separate menus mobile and desktop