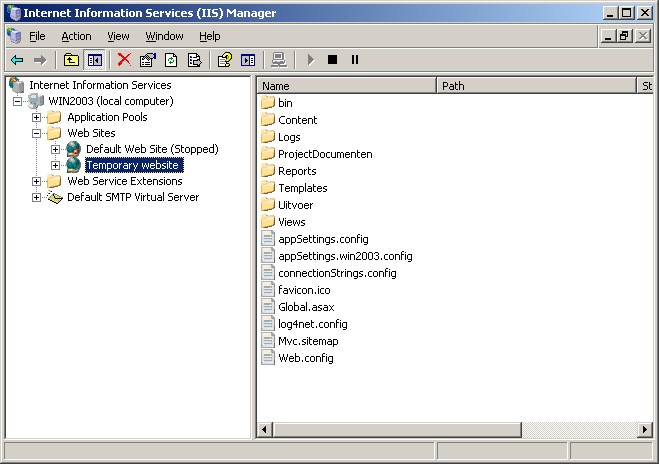
I had a hard time deploying an MVC4 application to Windows server 2003, so I thought I’d share my experience with you.
When deploying an MVC4-based website to Windows Server 2003, it is important to add Wildcard maps in Internet Information Services (IIS). The default IIS-configuration is based on extensions coupled to ISAPI-addins, but MVC doesn’t work with extensions so you need to tell IIS to have a ‘catch-it all’ extension. Here are the steps necessary to do so.
The target framework needs to be 4.0
If you develop a MVC4 website using Visual Studio 2012, the default .NET framework is 4.5. Windows 2003 doesn’t support the .NET framework 4.5 as you can read over here, so you need to downgrade the target framework to 4.0. You can easily do this with Visual Studio 2012 by changing the target framework in your project properties pages :

Installing the .Net 4 framework
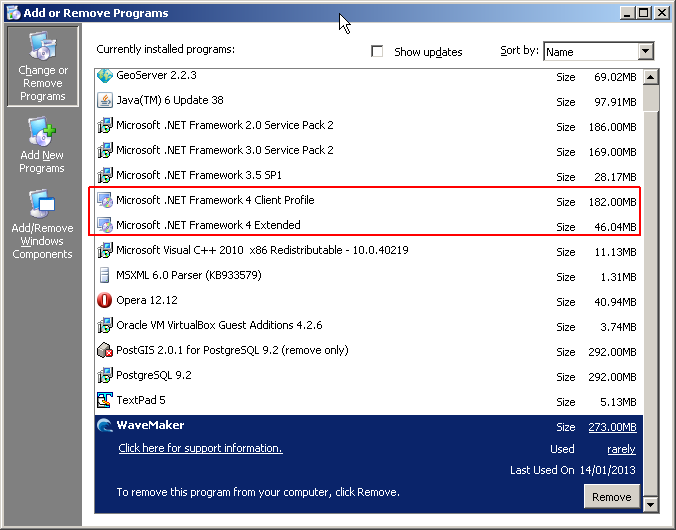
The next step is to install the .NET framework 4.0. This comes in two flavours, the .NET 4 Framework Client Profile and the .NET 4 Framework which is the full framework. If you are deploying webapplications, you need the full framework, the Client Profile is a subset of the framework for desktop applications. You can read more about the differences over here. You can download the full redistributable of the .Net framework 4.0 at microsoft. After you installed the .NET 4.0 framework, you’ll see the following listing in installed programs :
Configuring IIS to use .Net 4
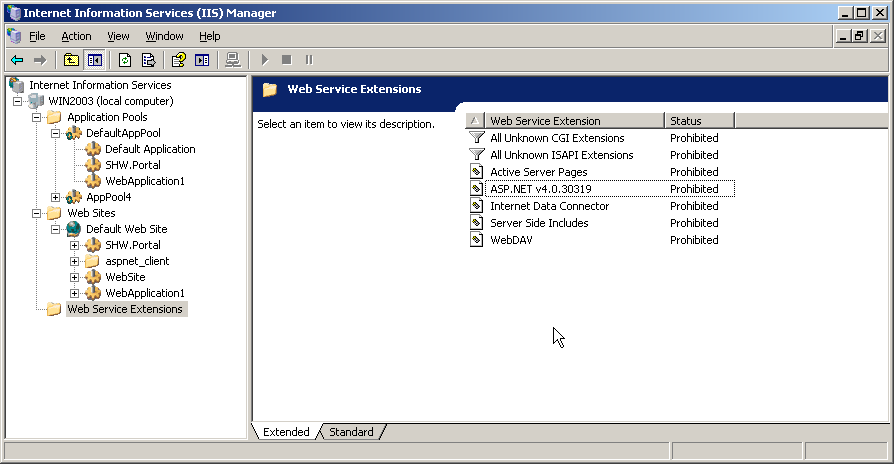
After .NET 4 is installed, it is registered to IIS as an Web Service Extension, but it is not enabled by default:
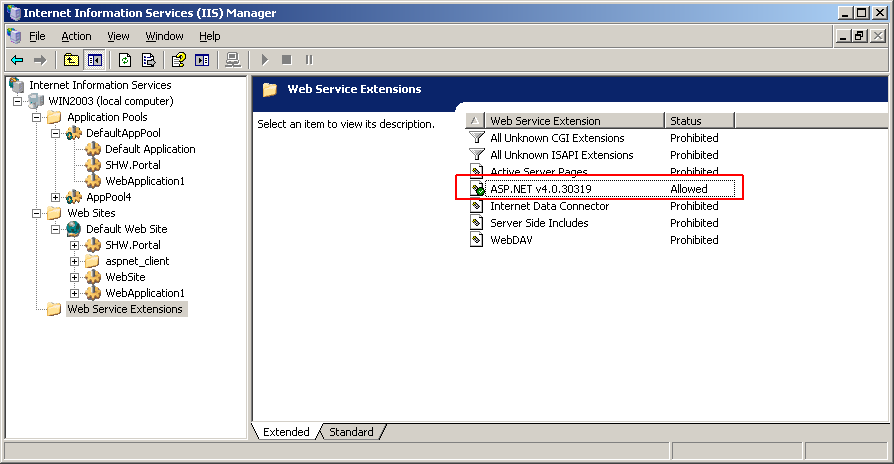
ASP.Net v4.0.30319 line and select Allowed. After that, you should see the following screen :
Adding a Wildcard map
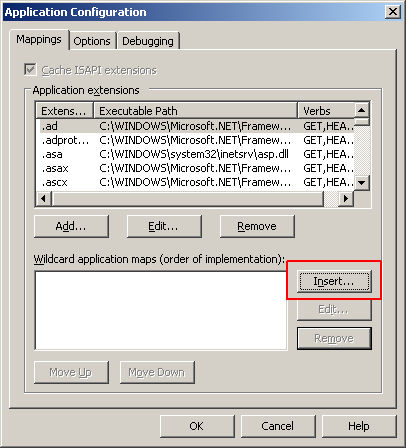
If you are deploying Web-Forms applications, then your done and your application should run. If you are working on MVC applications there’s one last step to do, you need to add a Wildcard map for your application. Go to IIS, select your project and choose Properties→Virtual Directory→Configuration and you’ll see the Application Configuration screen. In the lower part you can see a listing of installed wild card application maps, which is empty. You can add one by selecting the ‘Insert’ button:
The ‘Add/Edit Application Extension Mapping’ dialog shows up. In the Executable-text field, enter the path to the .NET Framework 4.0 isapi-extension which is normally c:\Windows\Microsoft.NET\Framework\v4.0.30319\aspnet_isapi.dll. Be sure to unselect the ‘Verify that file exist’-checkbox :

Choose ‘OK’ and close the screen. Your dialog should now look like this :
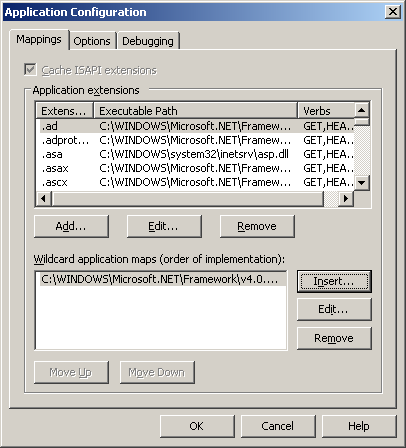
Close the screen, and your MVC4 application should now be ready to run!
